Tag Archives: recycled crafts

5 Musical Activities With Directions In Spanish

actividades

Are you part of a bilingual school, preschool or cultural center?  Would directions to some exciting musical projects in Spanish make a fun addition to your classroom or enrichment activities?

Although we don’t have all our activities and posts in Spanish, here are some of our reader’s favorites, especially for making and playing with young children.

Make a Roly-Poly Thing!  -  Construye Una Cosita Musical Que Rueda https://creciendoconmusicblog.wordpress.com/2014/05/08/construye-una-cosita-musical-que-rueda/

Make Your Own Gong!  -  ¡Haz tu propio gong!  https://creciendoconmusicblog.wordpress.com/2013/09/13/haz-tu-propio-gong/

Make Your Own Recycled Shaker Eggs – Haz tus propios huevos sonajeros reciclados  https://creciendoconmusicblog.wordpress.com/2013/08/13/haz-tus-propios-huevos-sonajeros-reciclados/

Making Rattles With Recycled Materials – Haciendo Sonajeros De Materiales Recicladas https://creciendoconmusicblog.wordpress.com/2012/04/06/haciendo-sonajeros-de-materiales-recicladas/

Make Some Marvelous Maracas – ¡Preparemos unas maravillosas maracas! https://creciendoconmusicblog.wordpress.com/2012/02/06/preparemos-unas-maravillosas-maracas/

FacebookTwitterGoogle+Share

Kaleidoscope Rattles

kaleidoscope rattle and shayHave you ever looked through a kaleidoscope to see an ever-changing array of beautiful colors?

Here’s a fun little rattle that creates a lovely flow of colors when it’s played. And it’s nice and quiet so it’s perfect for music-making with a large group of children or for kids who have noise sensitivity. It’s also one of our favorite projects for creating with kids on the autistic spectrum as it’s fun to make, easy to control and the sound is soothing and not harsh or abrupt.

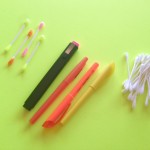
Here’s what you need to make your own kaleidoscope rattles.

Supplies

Clear Recycled Plastic Bottles (like from water or juice) with a lid
Q-tips
Washable markers
Electric tape (for sealing the rattles)

What To Do

Clean and dry the plastic bottles thoroughly. You can do this easily by rinsing them out and placing them upside down in a regular glass or a jar.

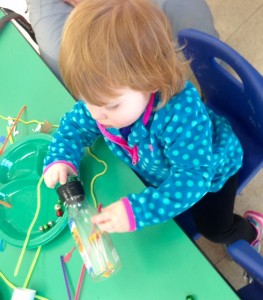
Kaleidoscope Q tipsNext take the washable markers and color the tips of the Q-tips any color that you like.  Color as many as you like and drop them into the bottle.

Every so often, shake the bottle to see if you like the sound. The tone of the rattle will change each time you add another Q-tip to the container!

When you’re satisfied with the array of color and the sound of the rattle, put the lid on and seal it up with electrical tape to keep the contents inside.

Time To Play!

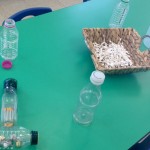
kaleidoscope tableShaking the rattle around in a circular motion displays a wonderful changing series of colors.  But since this is a rattle, you can play it any way you like. Shake it up and down, side to side or get up and dance with it!

Shake it along with a favorite song that you love to sing. Or play along to recorded music. Make several and compare the sounds as well as the colors as you enjoy your handiwork.

Have fun and keep making music!

Turn a Milk Jug Into a Recycled Shekere

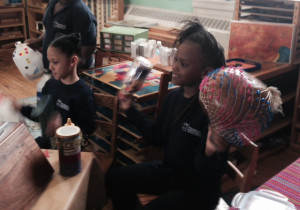
recycled shekeres in classDo you know the three R’s? Reduce, Reuse and Recycle.

How about the four “R’s”?   Reduce, Reuse, Recycle… and Rock Out! While you’re going greener and thinking about reducing or reusing plastic, here’s a fun way to turn large containers into child-size versions of African shekeres.

What’s a Shekere?

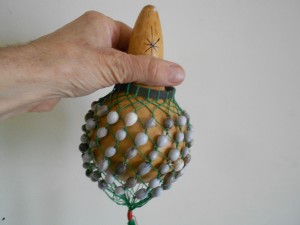
I wonder if shekeres were “original recycling projects”. Perhaps someone looked at dried gourds and decided they could be made into musical instruments. To do this, a netting of beads (called a skirt) was crafted around the gourd and small beads, seeds or shells were strung in the fiber to create the sound of the instrument. Most music historians believe the shekere began in West Africa but can now be found with variations in size, beadwork, shape and manner of playing throughout the African continent and around the world.

A Milk Jug Shekere

Since you probably have more plastic containers than cleaned and dried gourds, start by finding an empty milk jug, large water bottle or similar item from your recycling bin. Before you begin, make sure it fits nicely into your child’s hands.

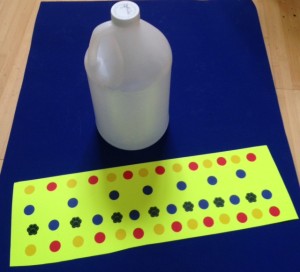
Recycled shekere plus paper to beadBeading With Stickers or Markers

Doing intricate crafts like beading is great fun but takes practice and patience, plus motor skills that can be a difficult for small children. Here’s an easy alternative.

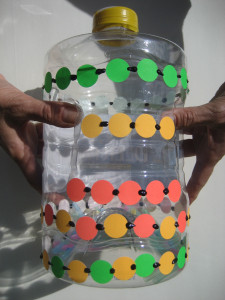
If your container is clear and clean, you can place stickers directly onto the plastic bottle or draw “beads” with markers, making colorful patterns or shapes. If there’s a label on the container, you can cut out a piece of poster board or construction paper to fit the container and lay the paper flat. This makes for easy “sticker beading” and a fun way to explore patterns, shapes and colors with your young child.

If you’re working with a classroom of kids or have a limited time to do this project, you can skip the aspect of trying to “bead” the shekere and allow the kids to simply decorate the outside of the container.

Sounding Good!

mini shekere for storeIn traditional shekeres, the sound comes from the beads or seeds rattling on the outside of the gourd. In our recycled version, we’ll need to add something inside the container to create the sound.   Here are some suggestions for a quieter recycled shekere: sand, salt, sugar, tiny pasta (like acini de pepi), seed beads, Q-tips and paper clips. Here are some fillings you can use to create a louder instrument: pebbles, dried pasta, dried beans, popcorn kernels, marbles or pennies.

Once you’ve filled your shekere and you like the sound it makes. Put the cap on and seal it into place with heavy duty tape to keep this project child-safe.

plastic shekereTime to Play

Although a shekere is a rattle, there’s a lot of different ways you can play it. Here are some playing suggestions:

Hold the handle and shake.

Hold both sides and rattle the contents back and forth.

Hold both sides and toss it gently while twisting it.

Hold it vertically and toss it gently from hand to hand.

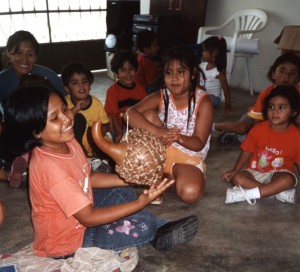
Peru_Preschool_ShakureSit a short distance from a friend and toss it back and forth.

With a group of children, sit in a circle and toss it from child to child around the circle.

Try any of the above ideas while singing or while music is playing. Try to shake along to the beat.

Links and Resources

Hear A Shekere

http://www.dariamusic.com/shekere.php

Color a Shekere Online

http://www.dariamusic.com/color_Shekere.php

Bead an African Shekere

https://makingmulticulturalmusic.wordpress.com/2013/12/04/bead-your-own-african-shekere/

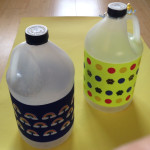
2 recycled smilk jug shekeresMake a Classroom Shekere (From A Gourd)

http://tinytappingtoes.wordpress.com/2013/08/05/easy-gourd-shekere-for-a-child-or-a-classroom/

An Alphabet Shekere Game

http://www.trueaimeducation.com/2012/10/guest-post-learning-letters-with-an-alphabet-shekere.html

Sekere.com – Beaded Sekeres from Master Craftswoman, Sara Fabunmi

http://www.sekere.com

Cultural Value of the Shekere, Article By Sara Fabunmi

https://makingmulticulturalmusic.wordpress.com/2011/10/25/the-cultural-value-of-the-sekere/

“Beach In A Bottle” Rattle

This simple, sandy beach rattle makes a great musical craft whether you live near the ocean or are just dreaming of warmer weather and seaside play!

Supplies
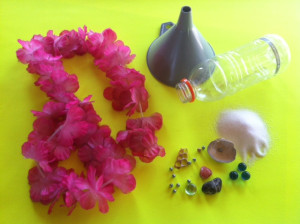
beach rattle suppliesClear recycled bottle – any size or shape.

A small amount of sand, salt or sugar.  (You can also substitute rice, couscous or tiny pasta for the same effect)

Funnel

Small shells, pebbles or tiny treasures for inside the rattle

Colorful silk or artificial flowers

Electrical tape (to seal rattle)

(Optional) glitter, colored sand, colored rice

 Make Your Own Rattle

This craft couldn’t be easier.

Save, clean and dry a variety of clear recycled containers and assemble sand, salt or sugar along with a funnel, sturdy tape and other decorative goodies you might want to add to this project.

Using the funnel, fill the container with a small amount of sand, salt or sugar.  Put the lid on and listen to what the rattle sounds like.  Adjust (with more or less sand) until you find the sound that’s most pleasing.

Here’s a hint.  Less sand, salt or sugar sounds and looks better, but feel free to experiment and see what you can create.  When you’re done, seal the rattle up with sturdy tape (such as electrical tape) to keep the project completely child-safe.

Beach Treasures

Once you’ve found the perfect amount of “faux sand”, drop in your favorite tiny shells, pebbles or tiny treasures.  As you play the rattle and turn it from side to side, the small objects will appear and disappear in the sand.

 Tropical Flowers

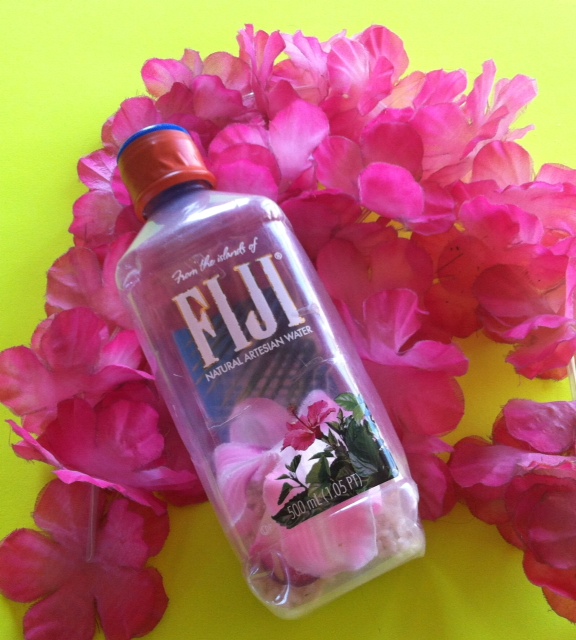
Although this doesn’t change the sound of the rattle, it’s fun to add a bit of tropical color to the rattle.  Look for silk or artificial flowers from a craft bin or take apart an artificial Hawaiian lei for perfect addition to the fun musical craft.

A Very Quiet Rattle

This rattle makes a soft whooshing sound so it is perfect for children with noise sensitivity.  Several music therapists have commented that these “seaside” rattles are especially enjoyable to the kids who are on the autistic spectrum.

Rattle Away

Don’t be fooled by how simple this little instrument looks.  There are lots of ways to play a rattle – this type of rattle or any other one you might create or find in your musical bag of tricks!

Try some of these suggestions or make up your own ways to play.

Rattle back and forth

Rattle up and down

“Swoosh” the rattle – move the contents around in a circular motion.

Hold in one hand and tap against the other.

Switch hands and try the above.

Hold the rattle at the top and tap the bottom on a desk or on your knees.

Hold the rattle at the top and tap the rattle sideways on a desk or on your knees.

Shake the rattle while dancing or moving.

Play it along while singing a favorite song.

Play it along while listening to a favorite song on a cd player or media device.

Make up your own “rattle moves”.

A Call And Response Rattle Game 

This is a great game to play with kids.  It teaches listening skills, enhances motor skills and is just plain fun.   Best of all it can be done several different ways.  Try it “one-on-one”, with a parent and child, special education student and aide or teacher and student.  It also works really well in a group, such as a teacher and a classroom, parent and preschoolers or homeschoolers and siblings.

The leader plays a pattern and the other (or other) must play that pattern back to them.  Start simple and get more complex.  Trade off and let the student or child make up patterns that the teacher or others must imitate.

Here are three simple patterns to get you started:

Shake the rattle up high twice,

Down low twice

Swoosh it around once.

And stop.


Shake the rattle twice in your right hand.

Swoosh it in twice in your right hand

Tap it twice on the desk while holding it in your right hand

Then change hands and repeat the pattern with the left hand


Tap it on the desk loudly.

Tap it on the desk softly.

Swoosh the rattle around.

Shake the rattle three times in your right hand.

Shake the rattle three times in your left hand.

And stop – or do it backwards!

———

During the month of February 2014, we’re doing a feature on Hawaiian music and giving away a real ukulele as well as Hawaiian pu’illi rhythm sticks.  You can see that related feature here: http://www.dariamusic.com/monthly_song.php